COST Stone Combinding 530 01 shabby 915,840 1728 shabby = 576 Rough= 192 Blem = 64 Com = 16 ave = 4 Beaut = 1 Flawless 4,579,200 8640 shab = 2880 Rough= 960 Blem = 320 Com = 80 ave = 20 Beaut =5 flaw = 1 immacaulate 17,172,000 32400 shab = 10800 Rough= 3600 Blem = 1200 Com = 400 ave = 100 Beaut =25 flaw = 5 imm =1 perfect Route For Sub Mats To Do TT's 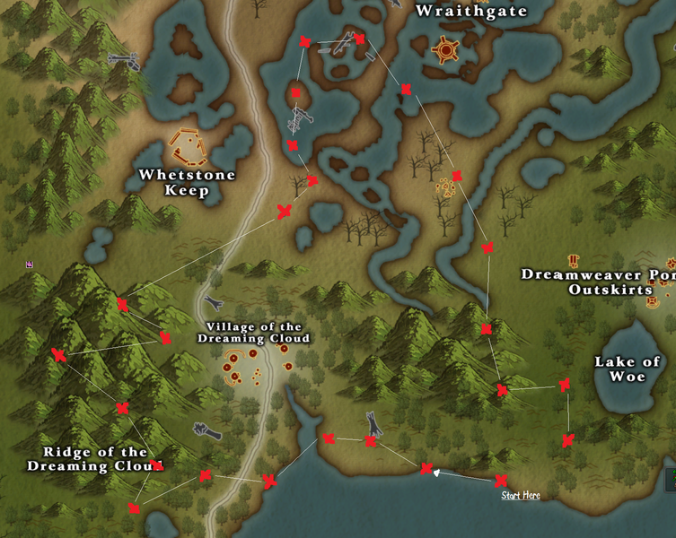 |
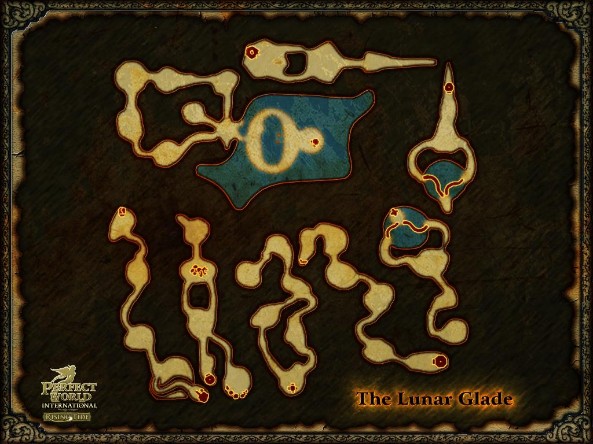
Map Of Lunar: See Lunar Walk Thru And Opening Lunar In Forum Section

FF WALKTHRU
When you enter FF talk to the Npc and pick up your daily Quest. ThunderClaw
1st boss - Periodically circles will appear on the floor, Run out of them as
soon as they appear. They are the equivilant to the hands in TT if they do blow up on you expect 5k dmg done to you. the Basic Squad Set up for FF is, One Barb , 2 Bles,,1veno and Either Two Clerics, Or one Good Cleric and A DD.
Glacic Elemental
2nd boss part 1 - There Will portals that appear with this boss, if the squad is 75+ everyone kill the mobs that will spwn in the portal in the back far Right. Then the mobs that will spawn in the front right corner.If the squad is 85+ Splitting into Two Teams to kill the mobs as they spawn on both the Left and the Right back corners.Then The mobs that will spawn in the Front two portals, this will weaken the boss.

Tough Diobolic Shocktrooper
2nd boss part 2 - This boss is random agro. The cleric(s) will need to purify often. Stay on the platform becuase after the boss is dead mobs will spawn. He randomly sleeps 1 person and randomly purple bubbles 1 person too which causes water dmg over time clerics job is to heal tank and if you see the purple bubble on anyone instantly purify them.
Cyclotra Stryren
3rd boss - Spawns 2 dragoons 1 at a time but make sure everyone picks up the quest before you kill it.Ice prizon has two adds one at begining one at 1/2 life)Kill the boss and remember to keep the adds off your cleric and you will recieve your first tab Faithfulness.

Dreadindra
4th boss - Summons Bishop Adds which you have 30 sec to kill till 3/4th life 20 sec at 1/2 life and 10 sec at 1/4 life. Heaven's Flame and keeping the adds Stunned as well killing them as fast as possible.The boss randomly purges 1 person except for the tank and has a magick damage Aoe, Stay close together so thebisops spawn close. Often most benificial to have the Veno Tank so the Barb can Rebuff the party.
Asoteric Runewolf
5th boss - If you see him say Super... Powerful.... Mighty... Whirling... Slash! Run his aoe and his self buff will kill anyone with in range of it. He unleashes his attack on the slash if you are the only one left at the boss your probly already Dead.After you have killed this boss, the rest are a cake walk.

Messenger Of Fear
6th boss - He Has an aoe sleep and an aoe 1/2 hp drain. Stay close together for the cleric to Do group heal.

Oceanic Master/Celestial Sister
7th boss - Do NOT use any aoe what so ever on this boss, if your not sure if it has an Aoe effect don't use it. A mini me of the boss periodically spawns and if he is even breathed on will kill everything but the barb.Ignore it and it will destroy itself.He spawns hands on a random person destroy it or the aoe from it will kill most the party. This next part is a mini a game basically everyone talks to the npc and then frozen heads spawn around the cross roads to the left of the npc. Easy one hit kills that give very nice exp and also each one you kill gives you another 1k exp per kill. Also must have the quest to receive your 2nd tab sincerity which gets your reward at the end after the red text appears saying all wraiths have been eliminated go ahead and talk again to claim your prize.


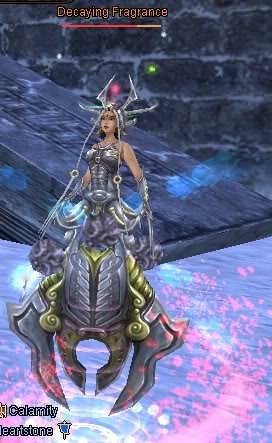
Decaying Fragrance
8th boss - This is FF's Version of pole arm.This boss is aoe stun, Debuff on tank this debuff must be purified or your tank is taking a Dirt nap IH or stream or rejuv and purify are your keys to success.
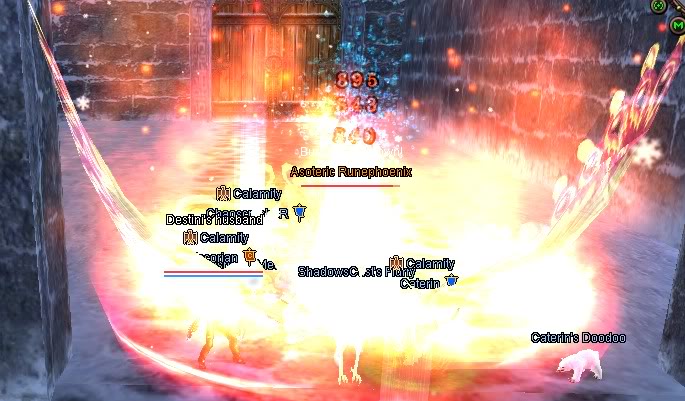
Asoteric Rune Pheonix
9th boss - this nix is alot like a nix he hits you with chi drain, hp drain and an aoe seal that will cause the herc to run from it. Group Heal is greatly effective here.
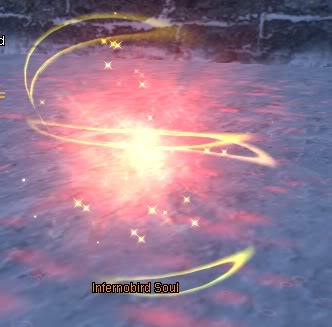
Inferno Soul Bird
After you kill the pheonix this appears red glowy orb hit tab to target it's a one hit kill and continue on.
Holeen Body/Soul
10th boss part 1 - Pull the Soul of holeen, This boss has false random agro you can have a party member at the entrance to the zone and he will still agro them. Stay in a tight group so the tank isnt running all over the place and the cleric can easily heal and purify when needed.

Champion Of Fientazzar
10th boss part 2 - This boss has Aoe Stun and 3 Aoes one physical damagewith Debuff Two magick damage . Having the cleric Set up BB as he will randomly agro and staying close will elimanate most of your problems.He does is a massive aoe debuff it takes away your attack speed your magic casting speed.

After the boss is dead talk to the npc and claim your reward a chest of sincerity inside there are alot of different items but most are annoying like 100 perfect stones flawless shards or 2 chests of coins but if your lucky you can get gold frost covered gear outta the chest.

Cube of FateThe Cube of Fate is a solo dungeon (shared instance) that you can enter starting at level 40. There are 50 rooms in the puzzle dungeon, each with it's own unique challenge to complete. Once you complete a room's challenge, you will receive a random six sided die that will move you forward throughout the dungeon. The objective is to reach room 50, however if you fail a challenge or are killed along the way, you will respawn back in room 1 with the option to either exit the Cube, or start the puzzle all over again.
While the Cube can be very frustrating at times, it can also be very rewarding. You could spend a few million coins and come out empty handed, or you could spend 100k and come out with a few million coins, 20 Mysterious Chips, and over 350,000 XP! It's completely random, though patience and persistence will certainly help.
You can only do this quest once per day (well, on the days you can afford it).
Requirements
* Level 40+ to enter
* 1 Badge of Honor, which you can get once per day from the Adventure Assistants/Khatru Pup in each of the 6 major cities
* 10-30 Mirage Celestones. Each Celestone can be exchanged for 2 Dice Tickets, and each room requires 1 Dice Ticket to begin the challenge. Some rooms have very difficult challenges, and can be bypassed by paying additional Dice Tickets
* 400-600k. Several rooms require 100-200k coins to pass, although usually you are given a chance to win additional coins back
* Patience. Some days it's going to be really easy, and some days it will be impossible to finish. Understand that going in, the Cube is completely random
Rewards
* XP! At level 70-79, it's worth 350,000 XP and 70,000 spirit IF you reach room 50, at 80+ it's 400k/80k
* Money. Several rooms have a chance to win either 1 million or 5 million coins
* Mysterious Chips. Up to 20 per run (5 per room, 4 chip rooms), can be traded for Legendary Molds at the Mysterious Vendor in Thousand Streams City
* ??????. At 80+ you get a chance to enter the Cube Lottery, but it's still not translated into English, so I'm unsure what the rewards are though database sites do show some legendary gear that comes from the lottery
* Pages of Fate. At level 90+, you don't get a XP reward for completing the Cube of Fate, but you do get pages that you can trade for your Demon/Sage skill books
Challenge Rooms
Click here for a video guide on the rooms. Credit to Maiya - Lost City! ^_^
Good rooms, meh rooms, rooms that really suck
[1] Fate's Beginning
Trade your Duty Badge for a Puzzle Cube at the Room 1 Teleport Master
Use the Forge beside him to repair, buy potions, and exchange Mirage Celestones for Dice Tickets
Choose 'Start the Challenge' to exchange your Puzzle Cube and 1 Dice Ticket, for a random die (1-6)
Right click on the die, and you'll move forward that many rooms i.e. if you get a 5 die and you're in room 1, you'll end up in room 6
[2] Chest of Mystery
Open 5 chests for quest items, get a die.
[3] Slaughterhouse
Kill 5 monsters, get a die.
[4] Mice Bashing
Kill 10 monsters, 1 hit each, use auto attack, get a die.
[5] Count the Apples
Count either the red, white, or blue wisps. Choose correctly, get a die.
[6] Open Sesame
Kill the boss mob in this room, who does a very weak AOE dmg (~100 every few seconds)
When he dies a Teleport Master will spawn, talk to him to get a die
The boss will respawn in about 20 seconds, so make it fast and don't AFK on auto attack for too long
[7] Have a Listen
Talk to the butterfly NPC to start the challenge
The goal is to find out which monsters have sound effects, the ones with the fire noise will 1 hit kill you, so slowly approach them until you find the monsters with no sound, and run through them to the other side
Try the 2 mobs against the left hand wall
[8] Try Your Luck
Costs 100k, open 10 chests and receive either a Sadness Card (sells for 1 coin), or a Ecstasy Card (sells for 1,000,000 coins)
[9] 100 Second Stand
Stay alive for 100 seconds
The mob in the center does AOE dmg, while the moving mobs do weak physical
Run to the corner of the room and kill any monsters that follow you, then just tank the AOE dmg
[10] Bombs Away!
A time bomb is attached to you and will detonate in 10 minutes
Once you reach the NPC in room 17 (or higher) ask him to diffuse the bomb
If you fail before the bomb goes off, make sure you have the NPC in room 1 diffuse the bomb
[11] Bored ...
Jail room, simply wait 3 minutes and you'll get a die
BE CAREFUL, this room is PK enabled (whether you're blue or not), so don't AFK here
[12] Choices of Fate
Receive a random token, either 1 room back, or 1-6 rooms forward
Right click to use it like a die
[13] Squad of Six
Either talk to the NPC while having 5 squad mates in the room, or pay 3 Dice Tickets to bypass the challenge
[14] I Don't Wanna Leave
The objective of this room is to get a die once someone in the room dies, so, you can either wait for someone to enter and then PK them
Or simply get yourself killed and start over at room 1
To kill yourself, run into the corner with the plant mob, which will debuff your HP by 80%, then agro the mob in the middle
[15] Mystical Messenger
First of four rooms where you can get Mysterious Chips (up to 5 per room)
You have 60 seconds to kill as many mobs as you can
You must turn the quest in at the middle NPC before the timer runs out, or you get 0 chips
You can only do the Kill for Thrills quest once per day, in each of the four rooms, for a maximum of 20 Mysterious Chips per run
[16] Fight the Demon
Must kill a very tough mob, only possible with a squad of people in the same room
Or you can pay X dice tickets to bypass the challenge and get a die
[17] Ecstasy or Sadness
Another chest room, pay 100k, open 10 chests, can either win 1 coin, or 1,000,000 coins
[18] Not Enough Yet
When you enter, you're given 9 Robber cards, but you need 10 to complete the quest and move on
You can either wait for someone else to come in and give you one of their cards, or
Use your Town Portal skill to go back to room 1
[19] Happy Hold-up
Talk to the NPC, get 5 extra Dice Tickets, and a die
[20] Another Choice of Fate
Receive a random token, either 1-3 rooms back, or 1-6 rooms forward
Right click to use it like a die
[21] Beast Hunter
Kill 2 mobs in 2 minutes, can be difficult depending on your level
For example, level 70-79 have to kill level 75 mobs, easier at level 79 than at level 70
[22] Mystical Messenger
Second of four rooms you can get Mysterious Chips in, same challenge, 60 seconds to kill 1-5 mobs
[23] Real or Fake
Must kill 1 mob, some are weak (never met one), most are hard, kite, use pots, not too difficult
[24] Consequence
Open 5 chests, get a die
You can change the amount of chests required to complete the challenge, to either 5, 20, or 100 chests
Leave it at 5, otherwise Karma will bite you in the ass ^^
[25] Dragon Gate
Run through the exploding hands, simply wait for them to explode them move through the circle
Reach the opposite corner and talk to the NPC for your die
[26] Death Judge
Must loot 5 chests, guarded by a mob that will 1 hit kill you
The mob moves very, very slow, so you can have him chase you to the corner of the room
Then run back and loot 2 chests, rinse, repeat
[27] Try to Listen EX
Same as the previous listen room, try the 2 mobs 2nd from the right wall
[28] Count the Apples EX
Same as the first room, count either the red, white, or blue wisps (it's random which one the NPC will ask for)
[29] Slaughterhouse EX
Kill 5 mobs, no time limit
[30] 100 Second Stand EX
Stay alive for 100 seconds, the AOE does more damage in this room, fairly easy with a HP charm
[31] Mystical Messenger
Third of the four Mysterious Chip rooms
[32] So Bored
Jail room, simply wait 5 minutes and you'll receive a die, PK enabled so don't AFK
[33] Monster Trapper
Kill 2 mobs in 2 minutes
[34] Steadfast
Same as room 14, either kill another player, or kill yourself and start over. If you do manage to kill another player here, walk along to wall to the opposite corner of the room to avoid agressing the middle ball, and make sure you talk to the NPC twice. The corner mobs only do a debuff which you can relog to clear (once you use the die)
[35] Life Diverged, Again
Receive a random token, either 3 rooms back, or 1-6 rooms forward
Right click to use it like a die
[36] Crazy Chest
Loot 10 chests, get a die
[37] Great Luck
Pay 200,000 coins, get a box with random goodies inside
Can include 1-3 Mirage Celestones, 5-10 Dice Tickets, or 2 Do-All Cards (can be made into Robber or Bully Cards)
[38] Dragon Gate EX
Same as room 25, except little insects run around that can 1 hit kill you, need to avoid both them and the exploding hands, for an easy time hug the walls tightly to avoid the insect patrols
[39] Consequence II
Open 20 chests, get a die
You can change the amount of chests required to complete the challenge, to either 5, 20, or 100 chests
Leave it at 5, otherwise Karma will bite you in the ass ^^
[40] Sadness or Ecstasy
Pay 100,000 coins, open 10 chests, either win 1 coin, or 5,000,000 coins
[41] Squad of Three
Create a squad of 3 players in the same room, or pay 10 Dice Tickets to bypass the challenge
[42] Mystical Messenger
The final Mysterious Chip room, 5 mobs, 60 seconds
[43] Take Down the Demon
Need a squad to kill these mobs, pay X Dice Tickets to bypass the challenge
[44] Bomber Mania
A time bomb is attached to you, must reach room 50 in 10 minutes or less
Talk to the NPC in room 50 to diffuse the bomb
[45] Open, open sesame!
Same as room 6, kill a boss mob (weak, 100 dmg AOE) that has tons of hit points, takes 20-40 minutes depending on class and level, pray you don't hit the previous room and roll a 1
[46] Still not Enough
Same as room 18, get 9 Bully Cards, need 10
Either hope someone comes in and gives you one of theirs, or Town Portal back to room 1 and start over
[47] 100 Seconds, Bring It On!
Stay alive for 100 seconds, same as the previous two 100 second rooms
Mob in the middle does significatly more AOE dmg (impossible for a 80 Archer)
If you're not a Barbarian or Cleric, just die and start over
If you want to try it make sure you have a HP charm, both restoration and HP pots, and possibly damage reduction charms, though I'm not sure if the damage is physical or magic
[48] Chest Unlocker Hardcore
Open 10 chests, get a die
[49] Prize Raid
Have 2 minutes to kill as many mobs as you can, each mob is worth 5000 XP and 1000 Spirit
[50] Fate's End
The final room, receive your XP, Spirit, and a chest that contains 1-3 Mirage Celestones, with a 5% chance to get a Badge of Dexterity (need 10 to make a Sign of Dexterity, need 1 of each Sign type to get the level 90+ Sage weapons)
Mysterious Chips
If you visit the Mysterious Merchant in Thousand Streams City, left of the city elder, you can trade chips + coins for legendary molds and items. It looks like most of the molds available come from FB 69-89, and some of the pricing seems a little skewed. You can also trade chips and coins for legendary materials from Twilight Temple, Lunar Glade, and the Warsoul (end game) weapons.

Rb Delta Walk thru:Welcome to Valley of Reciprocity. There are 10 Waves total with Progressing Exp and coin gain after Wave 3.For Rb Delta or Rebirth Order Delta, you will Need a Rianbow Squad, Which is one of each Class. Cleric, Barb, Veno, Blade, Archer, Wizard.Each Class Plays a specific important Role in the Rb Delta to Make it thru each wave. If the Blade is made the Leader you will Get Extra CeleBeans. Celebeas are used at the Npcs in the back LEft corner for Different auras that Will Aid you along your journey.
Cleric :Set up BB, Buff, At the end of each wave Cleric watches timer and keeps boss occupied while group digs. Calls back at 5 min mark.
Blade: Aoe’s Stuns, Kills as fast as possible so waves don’t stack up. Is group lead and does the aura set up as well as Quest acceptance after each wave/ digging the chest for extra celebeans.
Archer :Rains downs Barrage on the mass of mobs brought in for more damage.
Veno: Does the Happy Valley Quests for extra Celebeans to get more auras, at end of each wave brings the celebeans to the Blade.
Wizard: Sets up Aoe in Front of the BB to hold the mobs off the cleric and kill them.
Barb: runs out and collects up each wave to bring back, Times the waves so they don’t stack up on the party.
Before Wave 1: Group Leader ie Blade for more Celebeans Gives the happy valley Tickets to the Veno. The Veno goes thru the blue Portal and begins the quests by talking to the npc in the belebean area. Everyone gathers at the npc to the right of the Harpy wraith. The Group lead then talks to the npc to start the Rb delta. Following this they then go to the npc’s to the left of the blue portal and gets Mana Aura 1. the Mobs will Come down the long hall at the far end from the Harpy Wraith on the right. Set up Party 1/4 of the way into the hall in front of the eye. Jobs Listed above. After the mob waves are done, ie 3 or 4 waves of mobs the boss will come. The cleric keeps the boss busy, while the rest of the party goes thru the portal to dig the Chests.
After Wave 1: The archer and the blade kill the mobs for extra celebeans. When cleric calls 5 minutes (95) crew 2 minutes with a 100 crew, the party returns to kill the boss. Group Lead ie blade collects up the celebeans from the party , digs the chest to the left of the summon bot, Party meets at npc to Right of Harpy Wraith to get next wave Quest. Blade goes to aura’s Gets Chi 1 Def 1 Att 1 and health 1. Party Sets up and Gets Ready for next wave Veno Continues to do quests.
Wave 2: At end of Wave 2 Skeleton Legion Marshal ie first boss comes in, Cleric solos the boss till the 2 minute mark then kills it. This will bring a 2nd boss. the cleric keeps this boss busy til the 5 minute mark and calls the party back to kill it. By the 5 minute mark All chest and mobs in the celebean Area should be done. Party Returns at 5 min mark if not done before, kills boss, Group Lead Gathers All Celebeans, ALL party members meet at Npc to get next quest. Blade gets auras to max Defence and Att. for Wave 3.
Wave 3: First Wave coming in are all magick mobs barb should have samsara, Dew of protection or a charm. Next full wave of mobs are all Stun mobs, Barb needs Vaculity Powder so not to get stunned while pulling. Wave 3,7 and 9 are the hardest waves. Barb should sit at mouth of pull Area just outside BB range and wait tilll the mobs get to them before invoking. Gather all mobs or until invoke wears off, Run to BB this limits the Stun. Repeat to End of Wave 3. Blade Gets healing Aura 2.
Wave 4-8 Since all Beans are already dug, Just Return to Npc at end of each Boss to Start the new Wave. Each Wave will Rotate Physical Damage vs Magick damage mobs Be ready. Remember To Pull All the bosses back abit so thier aoe doesnt kill the party.
Wave 9 Do the same AS wave 3 With the pulling, Treat Wave 9 as if it is Wave 3
Wave 10 Has Only 2 bosses to kill no mobs.
Warsong Walkthru:
If you are level 80 or higher, you can fight in the new dungeon, Warsong City.
To get started, speak to the Watcher of Earth in any major city and accept the quest "Visit the Sanctuary." This quest will lead you to Dancing Melody in Sanctuary, who will send players to Warsong City.
Once inside, speak to Ginring. He is the guardian of Warsong City and will bring you up to speed on the situation within the city. The evil Incacerate, a great and terrible Wraithlord, was sealed in Warsong City years ago. Now his servants are attempting to free him, which would spell the doom of Perfect World. The only chance is to venture into Warsong City and destroy him before he can escape and gain his full power.
There are three stages to Warsong City. The first is "Raising Warsong." The second is "Protect the Incarnations." The third is "Heart of the City." Speak with Ginring and choose the "Start the Battle for Warsong" option to begin.
NOTE: In order to start the battle, you must be a squad leader and have 12 Mirage Celestones in your inventory.
The first stage is "Raising Warsong." In this stage, you must speak with Clearstream, the one who sealed the Incacerate long ago, and aid her and her disciple against the Wraithlord's minions while she prepares her spells.
NOTE: This stage is optional, but completing it will reward your squad with powerful Blessing items that will make the rest of the dungeon easier.
The second stage is "Protect the Incarnations." In this stage, you must split your squad between the five Elemental Pavilions of Warsong City. Each pavilion contains one of Clearstream's incarnations, who is attempting to remove the Incacerate's defenses. You must protect these incarnations from the constant Wraith attacks. If an incarnation falls, you will not lose, but the final stage will be harder because of it.
NOTE: Do not stray too far from the incarnations. Powerful and indestructible Flamefist Thralls wander the inner paths of the city and should be avoided at all cost.
Once the second stage ends, an NPC named Glowing Moon will appear. Speak with him to go to the center of Warsong City and begin the final stage.
NOTE: Do not linger in the Elemental Pavilions, or the Incacerate's minions will appear and destroy you.
The third and final stage is "Heart of the City." Now reunited, your squad must venture down each of the paths radiating out from the center, back to the Elemental Pavilions, and destroy all five of the Incacerate's generals: Pestilent Destroyer, Obscure Reaper, Snakefist Guardian, Cannonfist Orclord, and Shadowskull Lich.
NOTE: The more incarnations you protect in the second stage, the fewer monsters there will be between you and these bosses. Protect them well.
Should you manage to defeat all five generals, you will receive a reward based on your success in the second stage. However, in order to fight the Incacerate himself, you must protect all five of Clearstream's incarnations. Otherwise, you will be unable to face him.
[READY]
First off, I want to point out this guide reflects the Warsong instance before it was re- vamped. Many of the mobs that are now stun- able, were not. If you have information that will help bring this guide up to date, please keep me informed here. Also, keep in mind, this is the set- up we used. It is, of course, not limited to this squad only.
~~~~~~Items Recommended~~~~~~
Gold or Platinum Guardian Charm;
High recovery MP food;
High recovery HP food;
Charm of Defence (50% reduced magic damage. Used like a pot with fast recovery);
Mystic Armor Charm (50% reduced physical damage. Used like a pot with fast recovery);
Highest level attack charm equal to your weapon;
Well- refined and gemmed armor, accessories;
Equipment with resistances toward the element you will be soloing.
~~~~~~Recommended Squad Members~~~~~~
Blademaster
Blademaster
Cleric
Barbarian
Wizard
Archer
Blademasters should have at least 10k HP buffed, axe- build for the most available AoEs. Clerics can handle the bosses if they have at least 4k HP buffed. Barbarians are recommended to have 15k HP buffed.
~~~~~~The Break- down of Warsong~~~~~~
Before you begin Warsong, you will need to pay a total of 12 mirages; meaning 2 per squad member. As the squad leader, you are given the option to skip stage one or complete it. Completeing it gives you a choice of an attack or defence blessing. You also get a pill that reduces all damage taken, but lasts 15 minutes once used. If you want to do a complete Warsong run, you will need to successfully defend all of the reincarnations from the wraiths. Even if you save all the others, but one falls, you will be one point short from facing the final boss.
I.- Helping Clearstream -
If you chose to help Clearstream, head up the path toward the tree and hang a left. You'll be teleported to a platform. Wait for your teammates to arrive before talking to her- taking her quest triggers Incacarate to spawn and begin attacking. Cleric can use Chromatic Healing Beam here- Regenerative Aura is a waste with how low the boss hits everyone with the ideal squad. After a bit of damaging the boss, he will be sealed and leave behind yellow jade. Pick it up and anyone who receives it can talk to Clearstream again to have a hint pop up. Jump over the edge and you'll be teleported to the start.
Be careful not to walk into the portal that will send you back to Sanctuary.
Again, head back up the path toward the tree, this time taking a right down a path that will teleport you to another section of the map. You'll run down a slope and see mobs of each element guarding an NPC with a quest named Blazing Star. Have the barb run in and everyone grab the quest. Regenerative Aura will be easiest to cast here.
Tip: Sometimes the mobs will blow up, dealing massive damage. They will let you know in common chat saying "Let's die together!" Move a bit away, knock- back or have yourself immune to damage to avoid the hit.
After the first wave, another wave will spawn. Take this down until the quest states there are no more mobs to kill. Talk with Blazing Star and jump over the edge or run through the portal in the back to be teleported to the start once more. Speak with Ginring to activate the next portion of Warsong. Be sure to claim your pill and blessing. I suggest attack for all the party members besides the cleric.
II. Defending the Incarnations and the Pavilions
Fire: Wizard with fire resistant armor;
Metal: Archer
Water: Blademaster
Wood: Blademaster
Earth: Barbarian and Cleric
II Defending the sections of Warsong is what I gather soloing delta waves would be. Expect a lot of charm ticking and food use. Blademasters will have to be weary of the mobs trying to suicide and take you down with them; they can hit over 5k. Earth will also be a challenge for the cleric and barbarian. All I can recommend is the barb staying in human form and use Slam to knock- back the mobs that will try and suicide.
You will need to grab aggression of the Heads- they cannot die and hit hard. If any of the heads have Increased Attack or Sacrificial Assault, it's sometimes easier to just restart the instance. You can, however, stun them, seal them, knock them back and even sleep them.
If you die, hurry back to your pavilion or there is a high chance it will fall. You have only so much time to take out all 180 mobs. If the mobs vanish before you kill them, you saved the pavilion, but were not awarded the full points. You will need a total of 722 points minimum to face the final boss. You know you will have it when the quest is titled "Leading the Way."
If you are kicked to Sanctuary at any point during Warsong, you will lose your blessing and pill! You can use you pills here or at the bosses- whichever you feel you will need it more. If you decide to save the pill until the bosses, clear out all the mobs FIRST.
III.- The Heart of the City
Each element is split off into their own section along with a boss at the end. If you got the top score, you will see there are far less mobs to kill than normal. You will also see that most of them happen to be the more annoying ones to take out. The mobs aren't too much of a problem to take out; though, keep in mind water will use genie skills dissolve and occult ice as well as elemental weakness. Wood mobs will use extreme poison.
Fire's Boss: Cannonfist
Here is the beefed up version of TT's ape. Barbarian will tank with cleric spamming Ironheart and, probably, throwing in Stream of Rejuvenation. There is a nice long hallway just before the boss's platform; lure him to one corner as you fight him. He will hit hard, stopping only to summon his flesh beatles. They spawn right where he was pulled from- do not attack them, they will explode or vanish with time, around 20 seconds. As I said, Cannonfist will have stopped attacking, so pour on the damage to him before 20 seconds are up. His attack is very long range, so if you did not move away fast enough, chances are you are either dead or have mana burn. Fight him on the other end of the corner and wait for him to stop attacking and keep track of the time. He does not always announce that he has spawned the beetles. Rinse and repeat.
Metal's Boss: Snakefist
One of the more annoying bosses in Warsong, this boss deals more damage the longer you fight him, NOT dependent of his HP. You CAN kill this boss with minimal charm ticking. Cleric will set up Regenerative Aura and everyone is to pouring on their most damaging attacks. Use your Charms of Defence; his most damaging attack is magic. Use every genie skill available to amplify damage or pour on damage as well- you will see his health fall quickly. That's all there is to him.
Earth's Boss: Shadowskull Lich
This guy is deceptive. Barbarian will tank, cleric must be at max distance or face the high chance of being one shot. Lich splits four times; the first two times, they're a piece of cake; he dies, turns into a group of other mobs, each with the same add- ons like Sacrifical Assault, Increased Life, etc. Group them up and AoE them. The third time Lich pops up, however, he starts to show his turn colors. The skill, Frenzy, pops up and he makes a purple channeling animation- this is the skill that can one shot certain members of the squad. The fourth version is an even stronger version of the third. Pour on the damage and hopefully he will die before he even channels the attack.
Wood's Boss: ?
Aside from a random aggro attack that reduces your speed to 1 m/s, the barb can tank this guy with Ironheart or Regeneration Aura. He seemed like the easiest of all the bosses in Warsong.
Water's Boss: ?
This boss can make anyone cry; if you thought Snakefist was bad, this guy is worse. Things to keep in mind while fighting this boss:
-He has an AoE Occult Ice.
-He has a single target Occult Ice that is random aggro.
-If the barbarian, blademaster, or anyone else encounters this boss at melee distance, they will probably get hit for 35k+ damage.
Have your wizard or archer tank; a barbarian can tank if his weapon gives him range. The risk with this is, if the boss moves into melee range from random aggro and the barbarian takes aggression back, he will die. Chromatic Healing Beam the party when you can and keep spamming Ironheart on the tank. Badge of Courage will break out of the stun portion of occult ice. Having a genie that grants immunity to water damage will make this boss much easier.
The Final Boss: Incacarate
Once all the other bosses have fallen, and you have Leading the Way as your quest title, you will be given the option to encounter Incacarnate by the reincarnations that have spawned where each of the bosses fell. Take the quest and you'll be teleported to a platform where Incacarate wanders. Pull him toward the platform- as his HP drops, he will spawn all the other bosses once more. The final boss is no different than when you fought him in the very beginning and once he dies, he will drop Warsong Inscriptions. You need 80 of them to make one Warsong belt as well as the fragments.
As for the bosses that spawned, they were weakened versions that were more an annoyance and easily AoE- able. They dropped nothing extra and gave no extra experience.
[Intro]At the moment of writing, only one of the possible scenarios is available, Humorum MP mode.
It costs a total of 3 mil to open, so every squad member should trade 500k to the squad leader before starting.
As a rule of thumb, a good squad setup is barb, cleric (or two), bm, archer, wiz.
Venos are handy as always, but for once far from needed and having an extra zhenner makes it go a lot faster. Just personal observation, nothing against venos =P Mobs don't exactly hit hard, but have a ton of hp, and as such I would suggest they be zhenned in groups of 4-5 mobs at a time.
All of the bosses drop a healthy amount of essences, which are used in crafting armor, as well as in making Essence Crystals needed to manufacture the weapons and ornaments.
Only the three final bosses drop Tinders.
Average time of completion is 1.5-2hrs.
[Humorum valley]
Upon entering the Humorum valley, you will be given a hint to kill over half the mobs or the boss will go into frenzy mode. You receive a kill count quest, much like the one in TT 3-1/2.
(this goes for every subsequent valley as well; you have to kill 50%+1 mob before engaging the boss).
The mobs in Humorum valley can freeze, so keep that in mind when pulling new mobs into the zhen AOE. Don't wanna get frozen outside of BB with 3-4 mobs on you =P
Pretty straightforward valley, keep killing mobs until you reach a large room with several totems in it. Clearing it of mobs should get your kill quest counter complete as well.
Here's the important part. This room has two paths leading out of it, one to the left, and one to the right. There is a physical immune tombstone mob on each path. Killing this mob spawns the Humorum valley boss - Genesiac Blink; and depending on which tombstone you kill results in different 2nd valley and different final bosses.
[1.]Right path tombstone
If you opt to kill the right tombstone, you will get metal valley as your 2nd and get Drake Fling as your final boss.
[2.]Left path tombstone
Killing the left tombstone results in poison valley as your 2nd and Relic of Wind as your final boss.
[3.]Both tombstones
Killing both tombstones before killing Genesiac Blink will result in having Cognitum valley as your 2nd valley and Primal Fear as your final boss.
After you kill one of the tombstones (or both if you so choose) backtrack a little bit to the totem area in middle of which awaits...
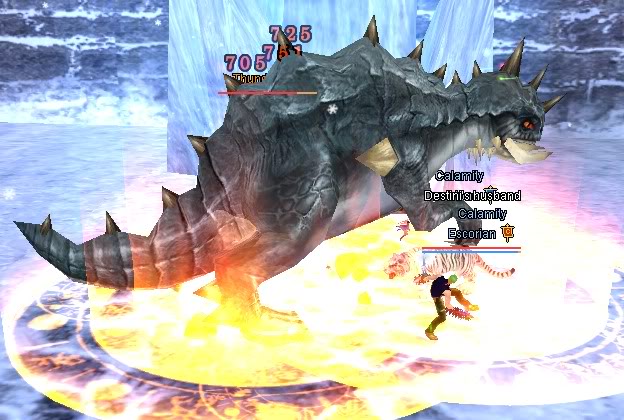
[Genesiac Blink]
This can either be a very annoying fight, or a walk in the park. As soon as you engage the boss, he spawns 3 adds that circle around him. They have an AOE earth debuff, and can hit pretty hard. The boss itself has a hard hitting short range aoe (one shots a 9x herc) and would normally require two clerics to down normally.
However, there is a trick to him that makes this fight a breeze.
Minimum safe distance from the boss is 26 meters. Have everyone stand outside of that radius and the adds will not aggro. If you have an archer, start by having them sharp tooth the boss. (One archer, not two if you have them because the 2nd sharp tooth would hit the adds). Barbs and bms get to sit this one out.
Everyone else maintain their max range and keep DDing the boss (for venos, this means using ONLY their celestial skills because of range, level 10 skills get you inside mob aggro range). He will randomly curse one party member, but no biggie, a charm ticker at best. Don't use any aoe skills, and he should go down without a hitch.
Special drop: Heart of Genesiac Blink (used in making Amulet of Valor)
Proceed on of the paths, past the stone bridge and talk to the NPC at the end to enter the 2nd valley. Again, which valley that is depends on which tombstone you killed earlier.
There is a Summonbot next to the NPC - Jaden Rutiodon.
Spawns in the water right next to the Summonbot - easy boss with a random single target sleep. Drops stamina mats.
[Imbrium valley]
This is by far the longest and hardest of the valleys currently available in Lunar Glade. The mobs hit with physical and magic attacks, stack DoT posion and can cast sleep. I definitely advise against going this route if you only have one cleric in the squad. Constant purify is essential here, unless you plan on pulling mobs one by one and thus spending a good 2 hours in here.
Killing the first 4 mobs spawns another Summonbot - Archelon. Relatively easy fight; water debuff on tank, sporadic weak aoe that interrupts BB. Ironheart on tank + aoe heal does the trick. Drops dex mats, which is probably the biggest reason why people opt to go this route.
Continue on the path, hugging the walls behind the rocks whenever applicable in order to avoid as many mobs as possible. Again, this valley is VERY long and you will get enough mobs for the kill quest no matter what.
[Mystical Jarax]
At the end, the boss of the valley awaits. Casts a random single target poison DoT, which should be purified or triple sparked asap. Can also randomly sleep one member, or cast a short duration aoe seal.
All in all, a very easy fight.
Special drop: Gloom of Mystical Jarax (used in making Eye Of Melancholy)
When he's dead, talk to the NPC and get teleported to final valley of Lunar Glade.
[Smythii Valley]
There is yet another Summonbot here - Deep Stranger. Dive into the water below the stone bridges to find him. Hits VERY hard and debuffs the tank. One of the debuffs lowers evasion, this one can be ignored. The other is the infamous pole/nob debuff which pretty much nullifies the tanks magic and physical defense. Should be purified asap or it could lead to a wipe. Strongly recommend two clerics or a charmed barb. Drops spirit mats.
Climbing back up can be a nightmare. Make your way to the ramp leading out of the water near the entrance to this valley on the left side, then double jump and holy path towards the south wall. May take a few tries.
Smythii, or metal valley is a relatively short valley with easy mobs. Take either path, and make your way to the boss. Try to hug the walls and avoid as many mobs as possible. Should you make your way to the boss and still miss a few mobs there are a couple mobs patrolling the route. Pull as many as you may need and once your kill quest finishes be ready to fight the boss of Smythii valley:
[Masaca Seben]
Starts out as an easy fight, albeit quite annoying. The boss spams an aoe debuff which greatly reduces channeling time and attack speed. At 50% or so he starts using an aoe metal DoT attack. Try to triple spark it or use some hp food, it hurts.
At 20% or so, he will start to self buff. If there's only one cleric in squad and no veno around to purge him, the barb should be ready to invoke when this happens, as he starts to really hurt when he's fully buffed.
In any case, he should go down eventually, allowing you access to the final valley of Lunar Glade.
Special drop: Tooth of Massaca Seben (used in making Helm of Gallantry)
[Cognitum Valley]
3rd and final of the possible 2nd valleys, it features physical mobs. Start by clearing the mobs on your path until you reach the large room up ahead. Again, hug the wall and circle around to the boss while avoiding mobs. There are a few mobs patrolling the room, killing these should complete the kill quest.
Hauntery Queen
Queen eh? More like a bearded midget, but whatever. Has a random aggro bleed attack which HURTS. If not purified or triple sparked it will kill just about any squishy. Also has a random curse+melee attack which again, will kill just about any squishy. Thankfully, no aoe or other annoying debuffs. Should go down relatively easy.
Special drop: Gem of Hauntery Queen.
Once dead, proceed to talk to the NPC and be teleported to the final valley of Lunar Glade
[Lunar Glade]
Regardless of your choice in Humorum valley, this is always the final valley you have to do before the final boss. Which boss you get however, depends on the tombstone(s) you killed in Humorum Valley at the very beginning.
Start off by going north and killing 5 mobs. You will need them for the kill quest in here. The ninetails can freeze, so again keep that in mind if pulling mobs mobs into the AOE. After killing 5 mobs, backtrack and go south, killing everything into your path until you reach the final boss.
Again, which boss that is depends on the tombstone(s) you killed in Humorum Valley.
[Relic of Wind]
By far the easiest of the three. Barb tanks, cleric ironhearts. He will seal the tank every now and then which should purified as soon as possible. Also has an aoe seal at his disposal but this one doesn't last nearly as long. Finally, he will also randomly curse one party member. Charm ticker at best, not enough to kill anyone though. Again it should be purified when possible.
Should go down easily enough though with no casualties.
Special drop: Shard of Relic of Wind (used in making Heart of Flames)
Crystal of Relic of Wind (used in making Sapphire Hat)
Unknown Tinder
[Drake Fling]
THE. HARDEST. BOSS. EVAR. Not counting harpy :D
Ancient evil and Illusion lord: Armageddon got nuttin on this dude :D
The real thing is mingled with 2 clones. Clones can be killed or the boss pulled away, it really makes no difference. You can tell which is which by looking at their HP.
Starts off easy enough, barb tanks, cleric ironhearts. No debuffs, no aoe, no anything. Then at 1.6mil hp he spawns two uber clones. The clones hit me for 3k melee, 2k magic, and they aoe. Fun stuff. We tried everything, including getting a 3rd cleric in the squad. Wiped 6 times or so before we started thinking out of the box.
Basically, there is an O shaped island behind the boss. Barb pulls the boss onto the O shaped island, and everyone DDs and heals from the water at max range. The damage is cut in half, turning this into a rather long fight, but alas the clones do not spawn at 1,6mil HP meaning you all get to live. Yay.
Also to note we had a daring archer go out of the water and onto the ledge at some point (after the clones would normally spawn). Still, one of the clones spawned on top of the archer, killing him, then aggroing the barb who as a result died as well from having the boss+clone on him.
So whatever you do, stay in the water until he goes down.
Special drops: Horn of Drake Fling (used in making Helm of Gallantry)
Scale of Drake Fling (used in making Ring of Zealousness)
Unknown and Chromatic Tinders
[Primal Fear]
Say hello to Mantavip's giant twin brother. Two tactics I can give for this one.
First one involves having the barb tank normally. Things should be going smooth until he does an aoe purge. When he does, barb should invoke instantly or he's a gonner because all buffs, including ironheart stacks go poof. So invoke, rebuff hp and continue tanking while the cleric rebuffs the squad and gets the ironheart stacks back up. He also tends to self buff near death which truly makes him deadly. If you have a veno, have her purge the boss asap. If not, pray the barb has enough sparks to invoke =P
The 2nd way of tackling this boss involves only ranged DD. There is a broken pillar in the lake right next to boss with a tip sticking out of the water. Everyone in the squad goes there (it's outside boss' aggro range) and starts DDing the boss. Since he's a stationary melee type (like Genesiac Blink) he won't be able to hurt you directly. He will still aoe purge and do the 50% hp debuff ocasionally though, as well as use an aoe attack. Clerics should be able to keep up with it though, and make sure the barb rebuffs hp after every purge. The only problem is his self buff. As soon as you see him self buff, get BB up and going. If he hits you with his aoe attack while self buffed, he will most likely kill everyone under 10k hp.
Requires a bit of luck in any case though, if he purges you, self buffs and casts an aoe imediately it will most likely result in a party wipe.
Special drops: Ring fragment of Primal Fear (used in making Ring of Zealousness)
Essence of Primal Fear (used in making Sapphire Hat)